Floating Deck Construction: Step-by-Step Guide
Essential Tools and Materials Needed
For a successful floating deck construction, having the right tools and materials is crucial. Here are the essentials:
Tools Needed:
- Measuring Tape: Accurate measurements are the foundation of any construction project.
- Level: Ensures the deck surface is even.
- Circular Saw: For precise cuts on deck boards and framing.
- Drill: Essential for securing screws and bolts.
- Hammer: Useful for driving nails and other tasks when building a floating deck.
- Shovel: Necessary for leveling the ground, digging post holes, and establishing a solid footing for the deck.
- Span Calculator: Assists in determining the appropriate spacing and sizing of joists.
- RedX Decks App: A digital tool for planning and visualizing the deck design.
Materials Needed:
- concrete blocks
- 3-1/2-inch and 2-inch or 2 1/2-inch deck screws
- Pressure-treated 2x8s
- Pressure-treated 5/4x6 or 2x6 decking boards
- Landscape fabric and gravel (optional)
Ensuring Stability and Safety
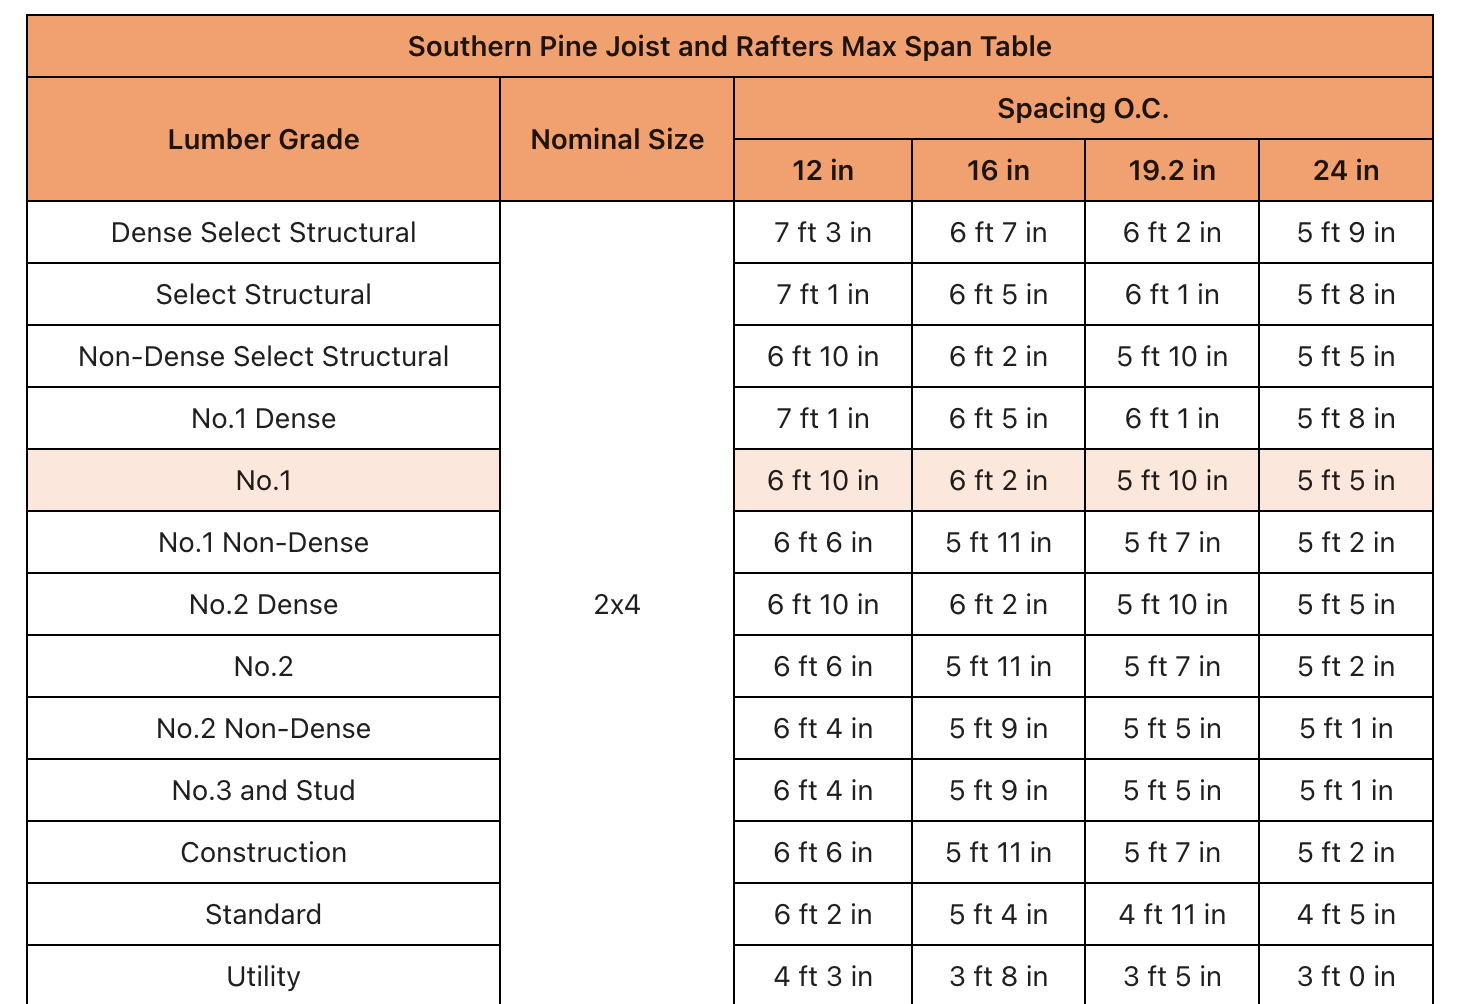
To ensure the stability and safety of your deck, precise planning and accurate measurements are essential. You can use a Span Calculator or refer to span tables for different wood species to determine the appropriate spacing and sizing of joists, ensuring they can support the intended load. These tools help prevent structural issues and enhance the overall durability of the deck.
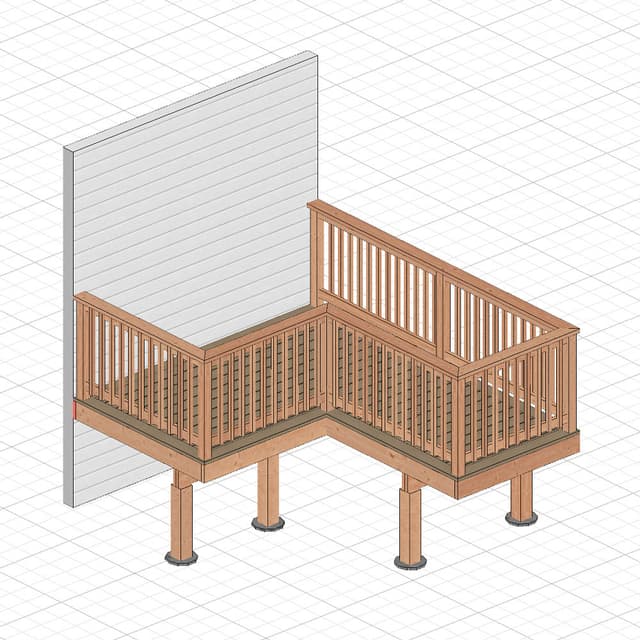
For a comprehensive planning experience, consider using the RedX Decks app. This innovative tool allows you to generate detailed blueprints and visualize your deck in 3D. By viewing the deck from multiple angles, you can make informed decisions about design adjustments and material choices, ultimately creating a safer and more aesthetically pleasing structure.
Step-by-Step Building Instructions
Prepare the Deck Area
Clear the ground where the floating deck will be installed by removing grass and any organic material to establish a solid footing. Rake the area to ensure it is flat and level, then tamp it firmly with a hand tamp tool. For added weed control, consider laying down landscape fabric over the soil and adding a layer of gravel.
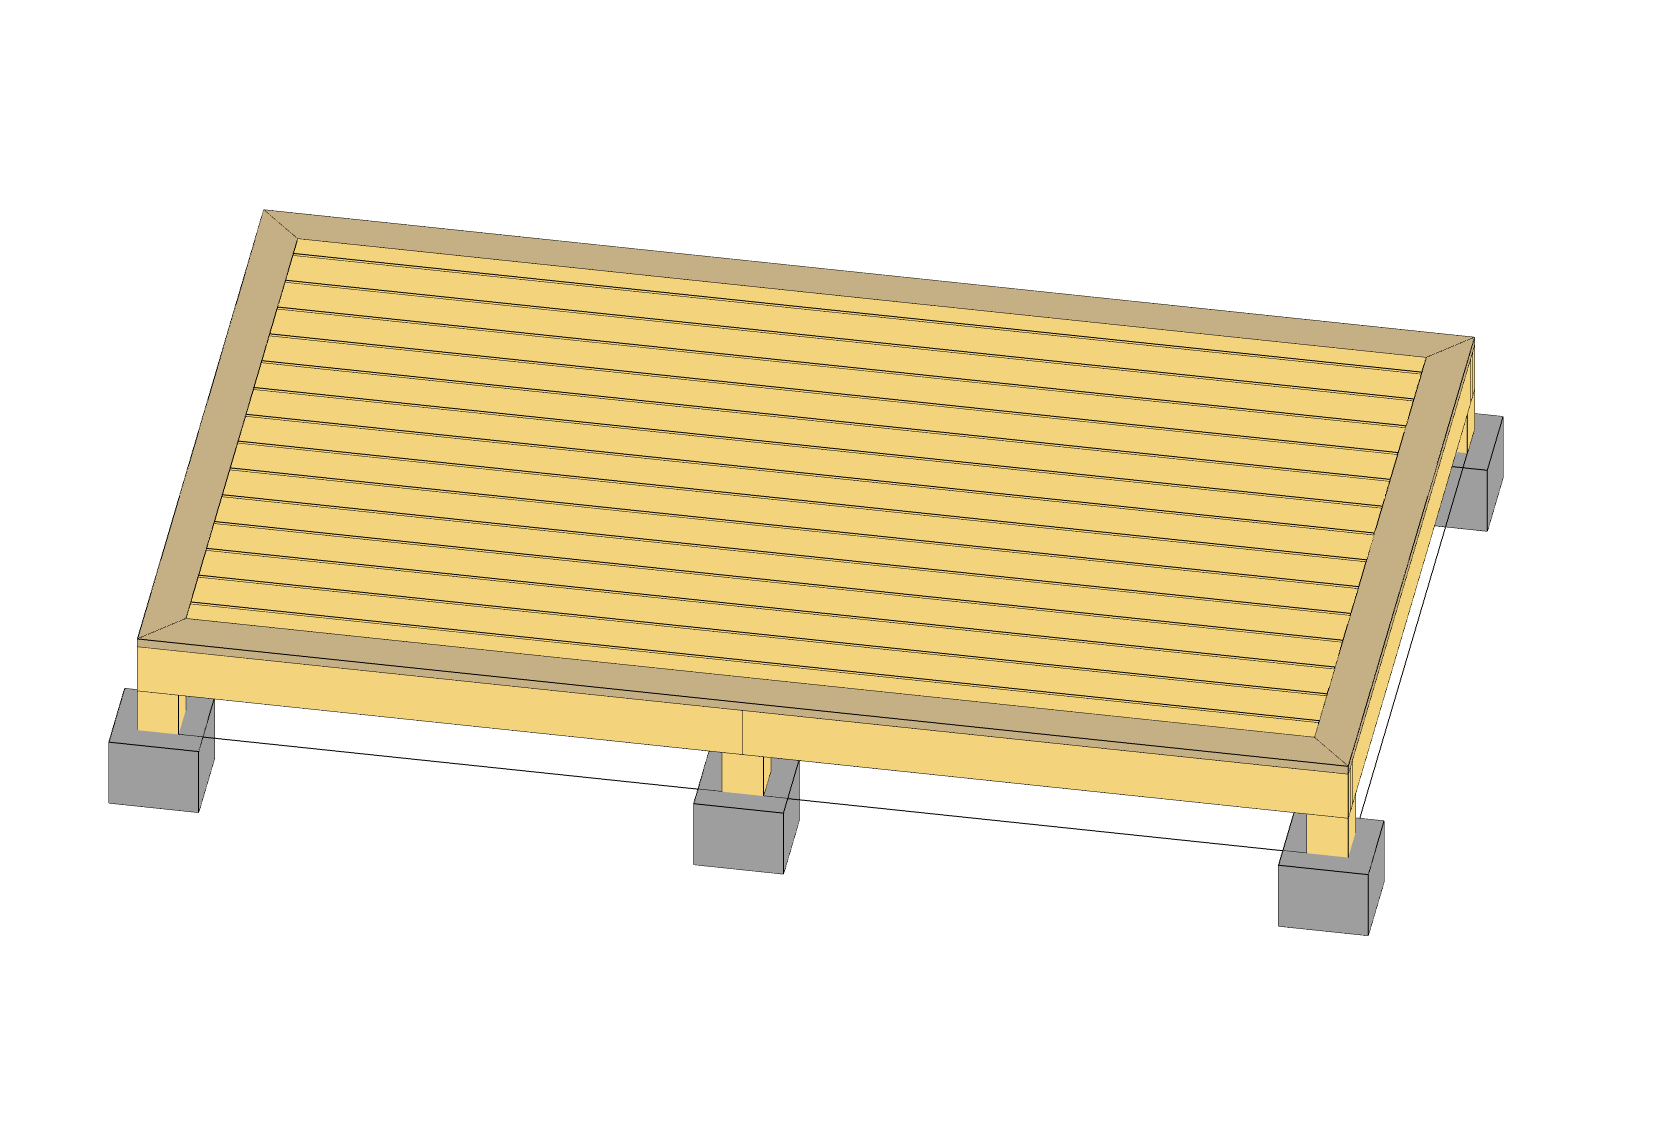
Position the Concrete Blocks
Arrange four concrete blocks in a rectangle, spacing them 12 feet apart along the long sides and 10 feet apart along the short sides, measuring from the centers of the blocks. Position an additional block between each pair of corner blocks to ensure even spacing. Use a level to confirm all blocks are level with one another, adjusting the gravel beneath them as needed to achieve a uniform surface.
Build the Outer Frame
Cut standard joists: Using a circular saw or power miter saw, cut the required number of pressure-treated 2x8 boards to the specified length for the standard joists. Trim end joists: Measure the end joists and trim them to the exact length needed. These will serve as the end joists. Dry-fit the frame: Arrange the end joists and rim joists over the ends of the standard joists to form the desired rectangular shape. Assemble the frame: Drill pilot holes and secure the pieces with deck screws at each corner. Measure from the inside of one corner of the frame and mark every 16 inches along one of the end joists. Repeat for the other end joist.
Position and Square the Deck Frame
Place the floating deck frame onto the concrete blocks, ensuring the frame parts rest over the centers of the blocks. Measure diagonally between opposing corners and adjust by pushing diagonally from opposing corners until the diagonal measurements are equal, indicating the frame is square.
Check the Blocks
Ensure the deck frame is level and makes solid contact with each concrete block, providing stable footing. Adjust the height by adding or removing soil or gravel beneath the blocks as necessary.
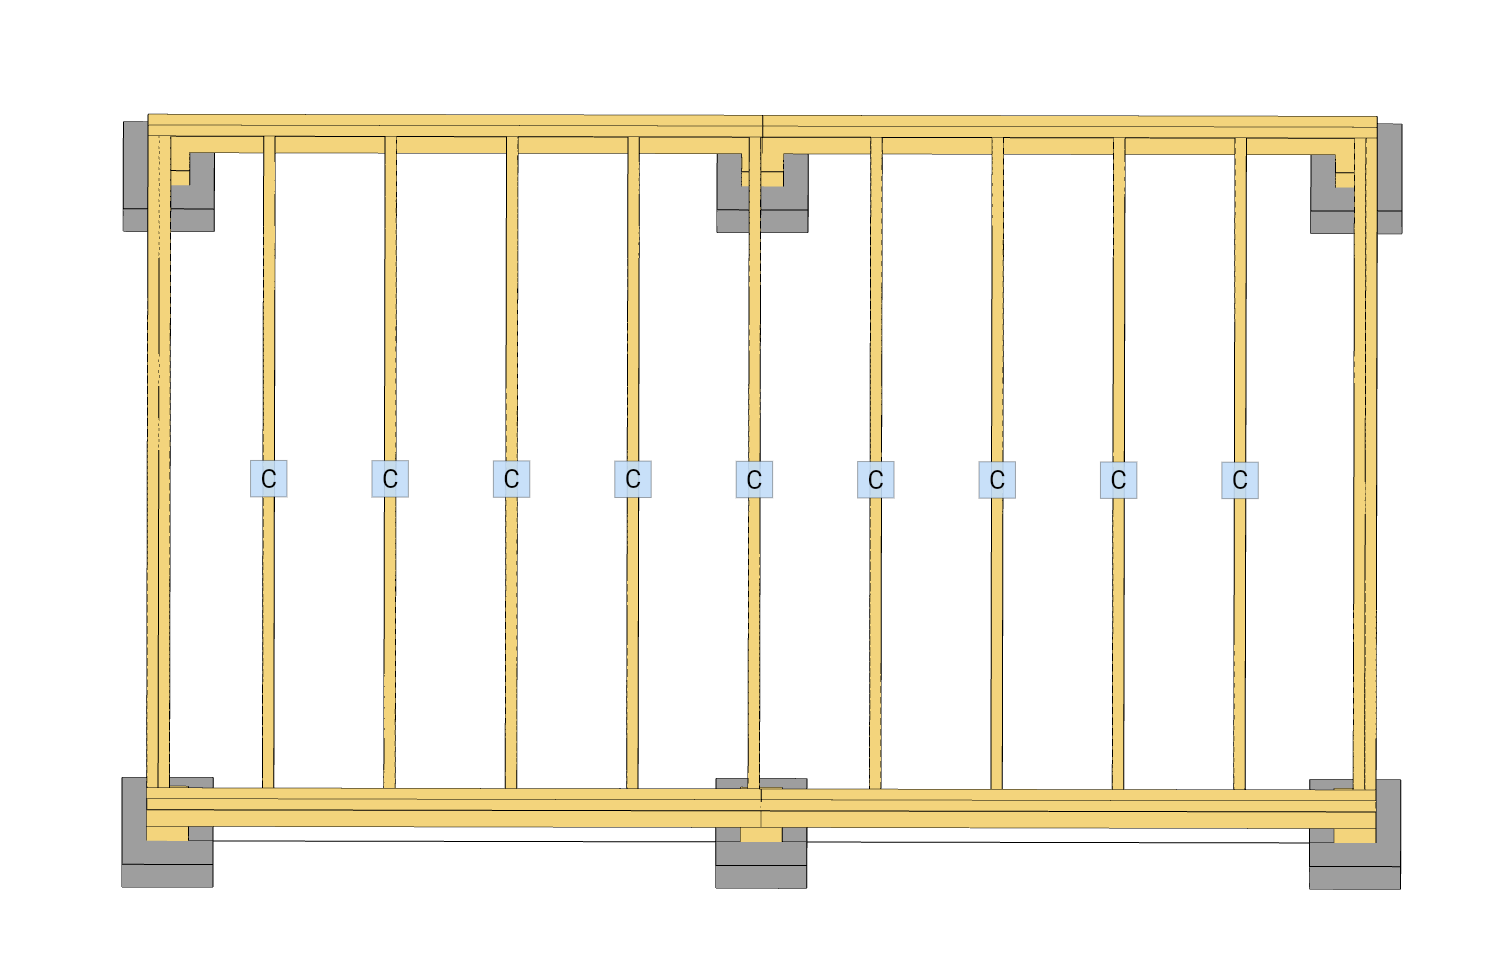
Install the Remaining Joists
Install the six remaining standard joists according to the layout lines. Keep the standard joists flush with the tops of the end joists to ensure the deck boards will lie flat.
Install the Deck Boards
Lay the 12-foot-long deck boards on top of the frame, perpendicular to the joists. Drill pilot holes and fasten the deck boards to the joists with deck screws, spacing them about 1/8 inch apart. Trim the ends of the deck boards with a circular saw to ensure they are even. Tip: Use 2-inch deck screws for 1-inch-thick lumber or 2-1/2-inch screws for 1-1/2-inch-thick lumber.
Finish the Deck
Finish the wood decking boards with a protective deck stain or sealer once the wood is suitably dry. If left unfinished, the decking will turn gray and weather naturally. Deck boards can also be painted, but paint tends to wear off quickly. The frame, if constructed of pressure-treated wood, does not require finishing.
Conclusion
Building a floating deck can be a rewarding project that enhances your outdoor living space. By following these step-by-step instructions and utilizing essential tools like a Span Calculator or Span Tables for different wood species, you can ensure the structural integrity of your deck. Additionally, leveraging the RedX Decks app for generating blueprints and visualizing your deck in 3D can streamline the planning process and help you achieve a professional result. With careful preparation, attention to detail, and the right resources, anyone can create a beautiful, durable floating deck that will provide enjoyment for years to come.