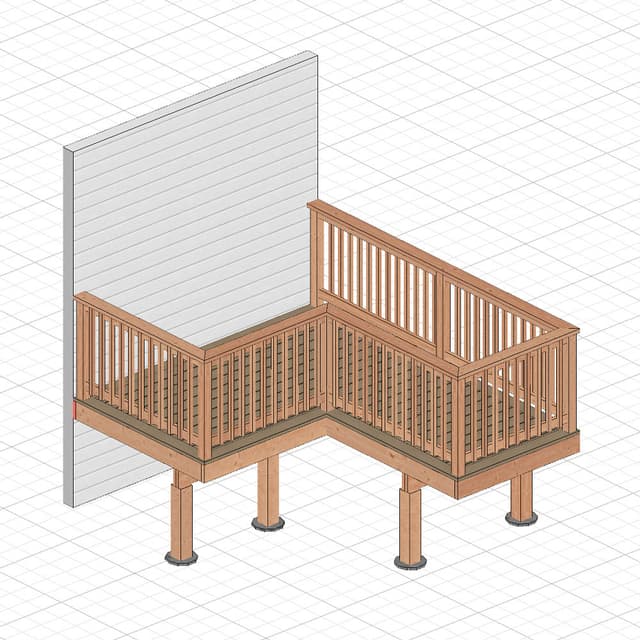
How to Build an Angled Wall Blueprint Using the RedX Walls App
In this tutorial, we will guide you through the process of building an angled wall blueprint using the RedX Walls app. The RedX Walls app is designed to be user-friendly for DIY enthusiasts while offering advanced features for professionals. Whether you're a home improvement hobbyist or a seasoned contractor, this app provides the tools you need to create precise and detailed wall blueprints with ease.
Getting Started
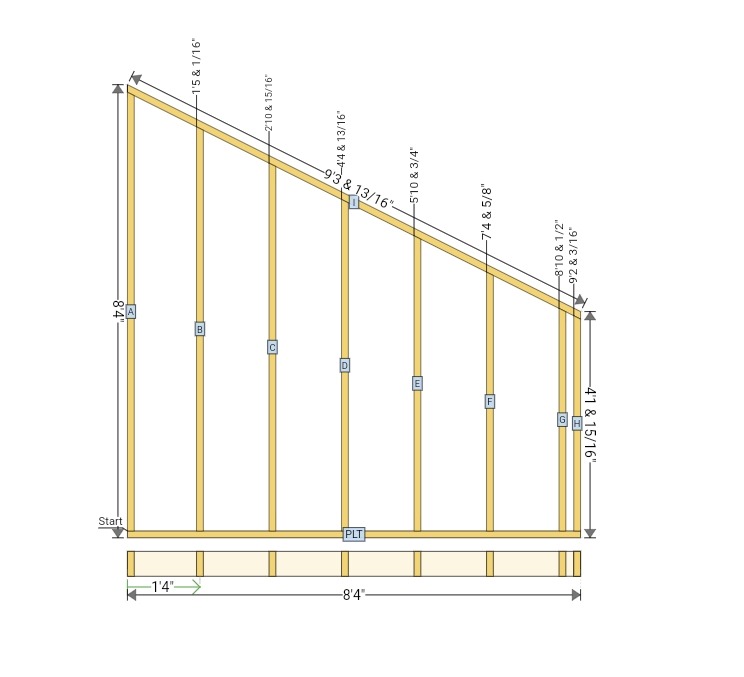
First, open the RedX Walls app and select the Angled Wall Builder. Upon selection, the app will generate a default wall for you. From here, you can start customizing the wall to fit your specific requirements.
Editing Wall Dimensions
- Total Wall Length: Adjust the total length of the wall to match your project specifications.
- Stud Spacing: Set the spacing between studs; the default is 16".
- First Stud Center: Define the position of the first stud center from the start of the wall to the first stud center.
- Peak Position: Choose whether the peak is on the left or right side of the wall.
Configuring Wall Height and Angle
The RedX Walls app provides a toggle field where you can choose between setting the wall angle with the left and right wall height or setting the top wall angle. This allows for flexible customization based on your specific needs.
Option 1: Wall Angle
- Select Wall Angle: Toggle the option to Wall Angle.
- Top Wall Angle: Enter the top angle of the wall.
- Wall Height: Enter either the left or right wall height.
Option 2: Wall Height
- Select Wall Height: Toggle the option to Wall Height.
- Wall Heights: Enter both the left and right wall heights.
By choosing the appropriate option and entering the required measurements, you can accurately define the configuration of your angled wall.
Wall Plate Details
In the Wall Plate Details section, you can change the wall depth. The default is set to 5 1/2 inches, which is standard for a 2x6 wall.
With these measurements entered, you will have your basic wall blueprint.
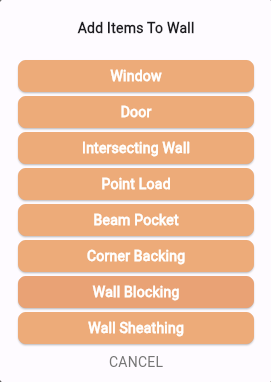
Adding Components
To add components, press the Add Items to Wall button. You can add various components such as:
- Window
- Door
- Intersecting Wall
- Point Load
- Beam Pocket
- Corner Backing
- Upper Top Plate
- Wall Blocking
- Wall Sheathing
Viewing the Cut List
After adding the components, you can view the cut list. This list provides:
- The label of each component
- The quantity
- The lumber size
- The usage label (e.g., STUD)
- The saw bevel angle, if required
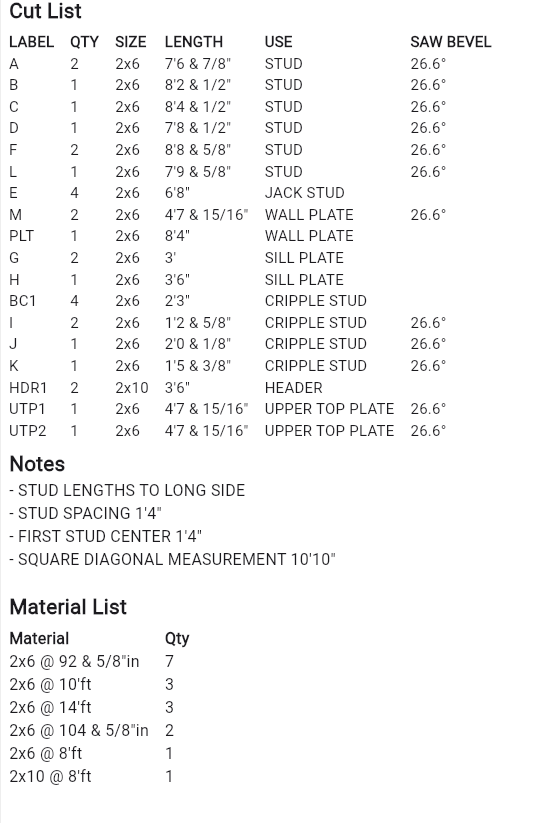
Important Notes
Under the Notes section, you will find:
- The square diagonal measurement
- First stud center measurement
- Stud spacing measurement
You can add more notes as needed when you save and export the blueprint.
Generating the Final Blueprint
Finally, once all your components are added and customized, the RedX Walls app will generate the final blueprint for your angled wall. This blueprint includes all the details and measurements you've input, ensuring accuracy for your construction project.
You can utilize the blueprint in several ways:
- Email: Send the blueprint directly to yourself or your team.
- Print: Print a physical copy for on-site reference.
- Save: Save the blueprint within the app for future use.
These features streamline your workflow and ensure your plans are always accessible.

Conclusion
The RedX Walls app is a versatile tool suitable for both DIY enthusiasts and professionals. It offers a simple interface and advanced features that make building wall blueprints straightforward and precise.
I hope this tutorial has been helpful in guiding you through the process. Feel free to explore the app further to discover more features and different wall types, such as advanced rake walls, tall walls, and straight walls.
Happy building!