How to Calculate Valley Rafters using the RedX Roof App
There are several different ways to calculate all the measurements to build a valley. I’ll cover the most efficient method I’ve found, which uses the RedX Roof app to automatically generate every measurement and angle to build your valley.
The app will create a 3D model of the valley and automatically calculate:
- Ridge length
- Every rafter length
- Sleeper board length
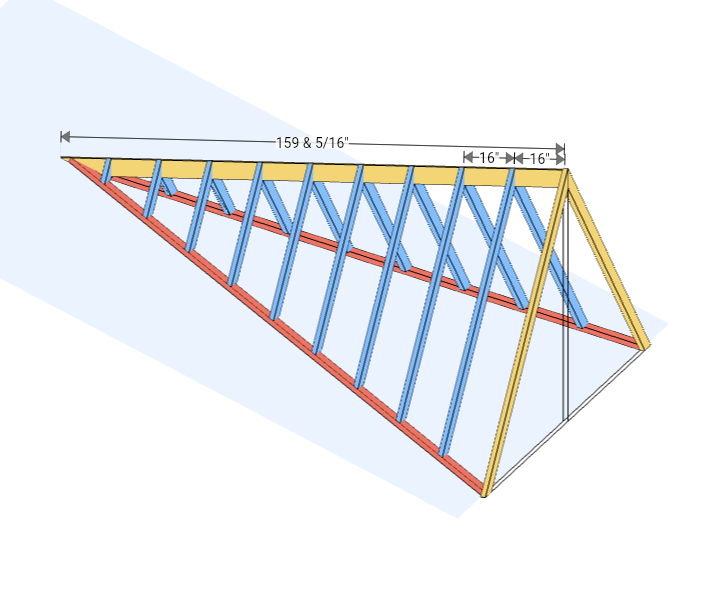
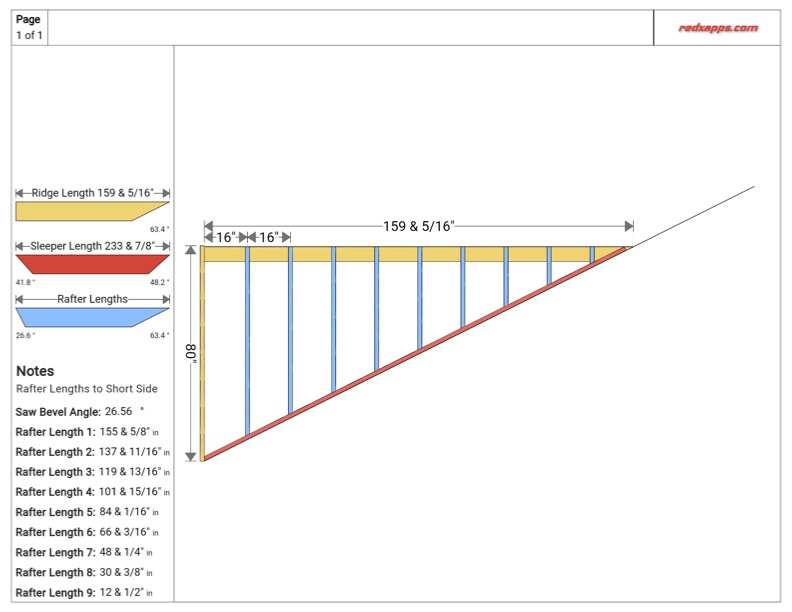
Here is what the plan will look like:
Inputting Measurements
My app is set to use roof pitch, but if you prefer, you can change the app to use roof angles in the settings (e.g., 26 degrees).
Measurements Needed
- Roof pitch that the ridge sits on: This is the roof pitch of the roof that the ridge sits on.
- Valley Roof Pitch: The roof pitch of the valley (the blue rafters in the image).
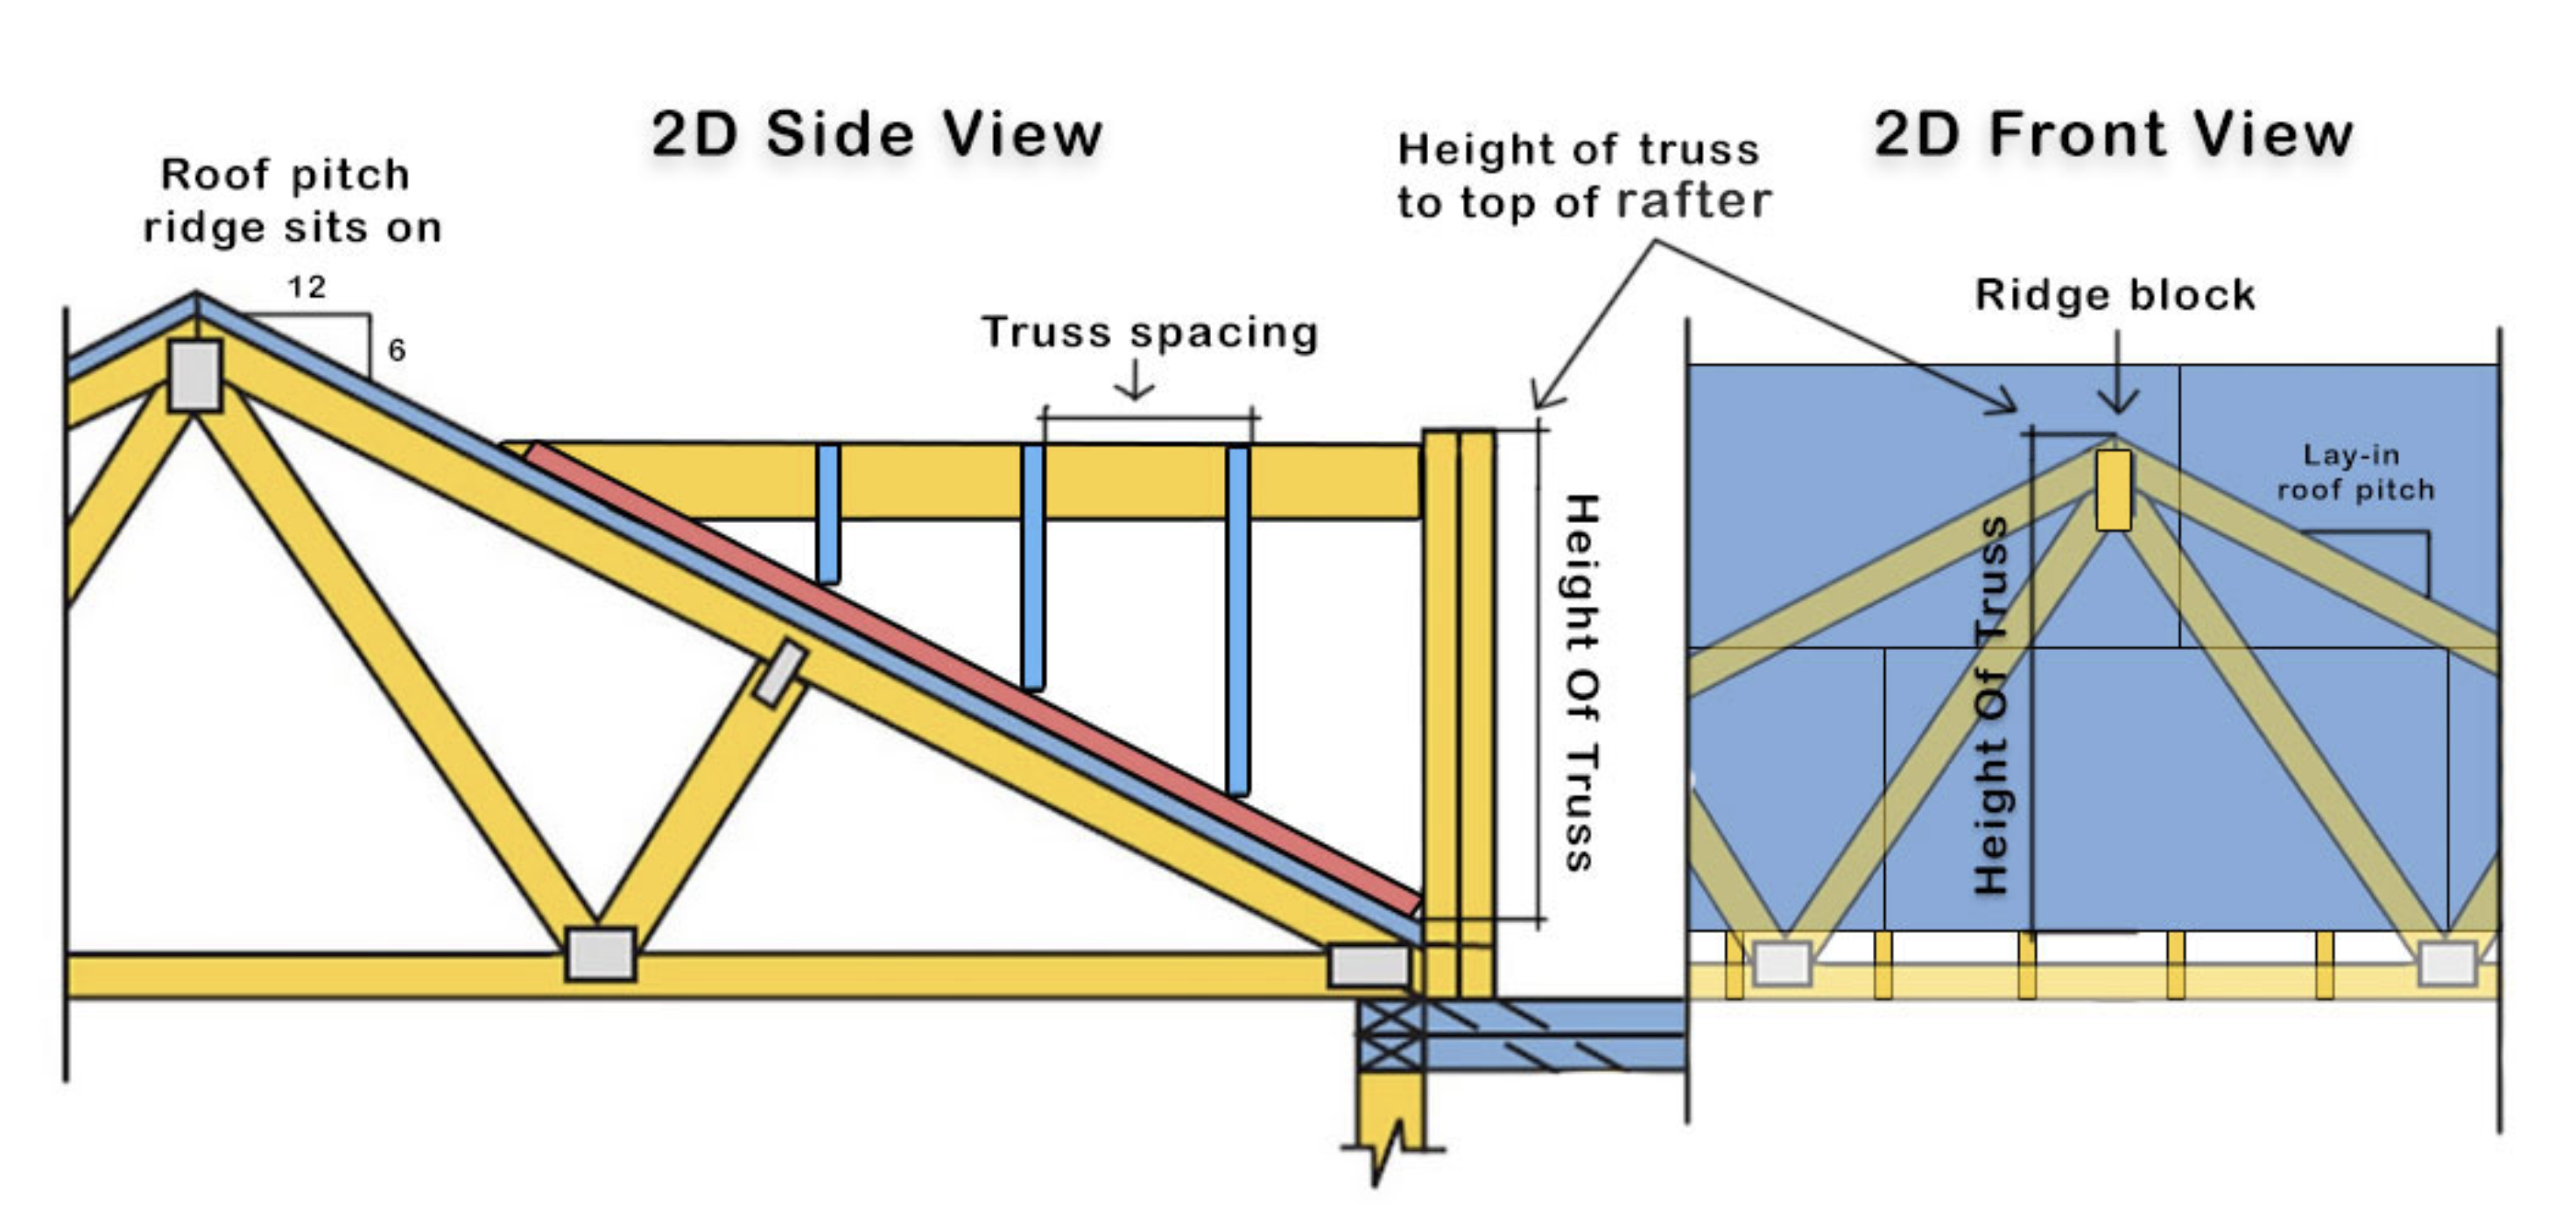
- Height of Truss: Refer to the image below.
- Rafter Spacing: The spacing from one rafter center to the next rafter center.
- Sleeper Board Thickness: The thickness of the sleeper board (e.g., a 2x6 would be 1 1/2 inches).
- First Rafter Center (Optional): Determines the layout of all other rafters. This measurement cannot be larger than the rafter spacing minus half the rafter thickness.
Use the image below to understand where these measurements are taken from:
Measurements and Cut List
With these measurements entered, The app generates a detailed cut list for the valley with all necessary measurements, angles and valley rafter length. ensuring you have all the measurements and materials needed.
- Ridge Length: The length of the ridge board.
- Sleeper Board Length: The length of the sleeper board (shown in red).
- Valley Rafter Lengths: All the individual lengths of the valley rafters.
Below is an example of the cut list with color-coded components:
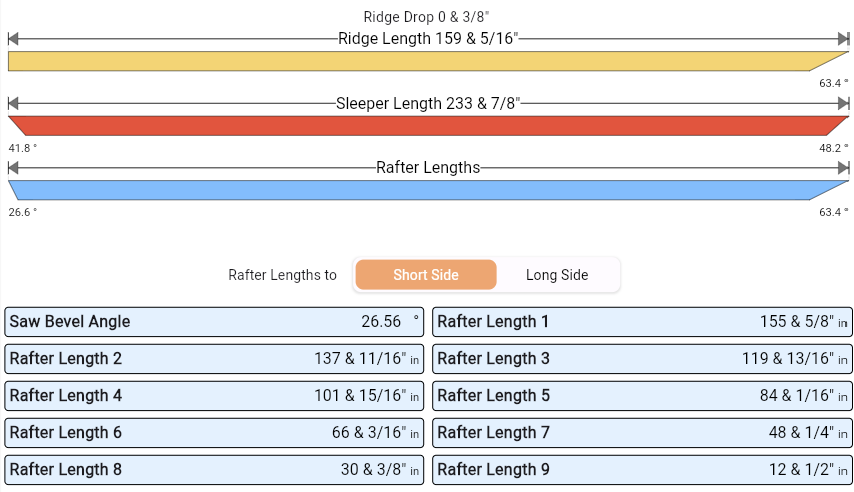
This list ensures you have precise measurements and a visual representation for each component, streamlining the construction process.
Generating the Blueprints
Once you have entered all the necessary measurements, the app can generate detailed blueprints for your valley construction. These blueprints include all the measurements and angles required for the project.
Print, Export, or Email
- Print: Tap on the Print button above the valley plan, and select your printer to get a hard copy of the blueprint.
- Export as PDF: Tap on the Share button to create a PDF version of the blueprint. You can save this PDF to your device, email it, or send it via text.
- Email: Use the Share button to generate a PDF and choose the email option to send the blueprint directly to your email or your team.
These features make it easy to share, print, or save your blueprints, ensuring you have all the details at your fingertips whenever needed.
Conclusion
This is the fastest and easiest way to build valleys using the RedX Roof app. You can pre-cut every piece on the ground safely, without needing to measure anything manually—the app handles all the measurements.
The larger the valley, the more time you save.
There are many other features in the app, like Hip Rafter Calculator, Turret Roof Builder, Plywood Angles, Dormer Builder, and more.
Do you think this is something that you would use?
Thanks to all of you who made it this far! Now let's get back to work!